$0+
Ableton Custom Preset Categories (For Virtual Instruments)
Find the perfect instrument faster.
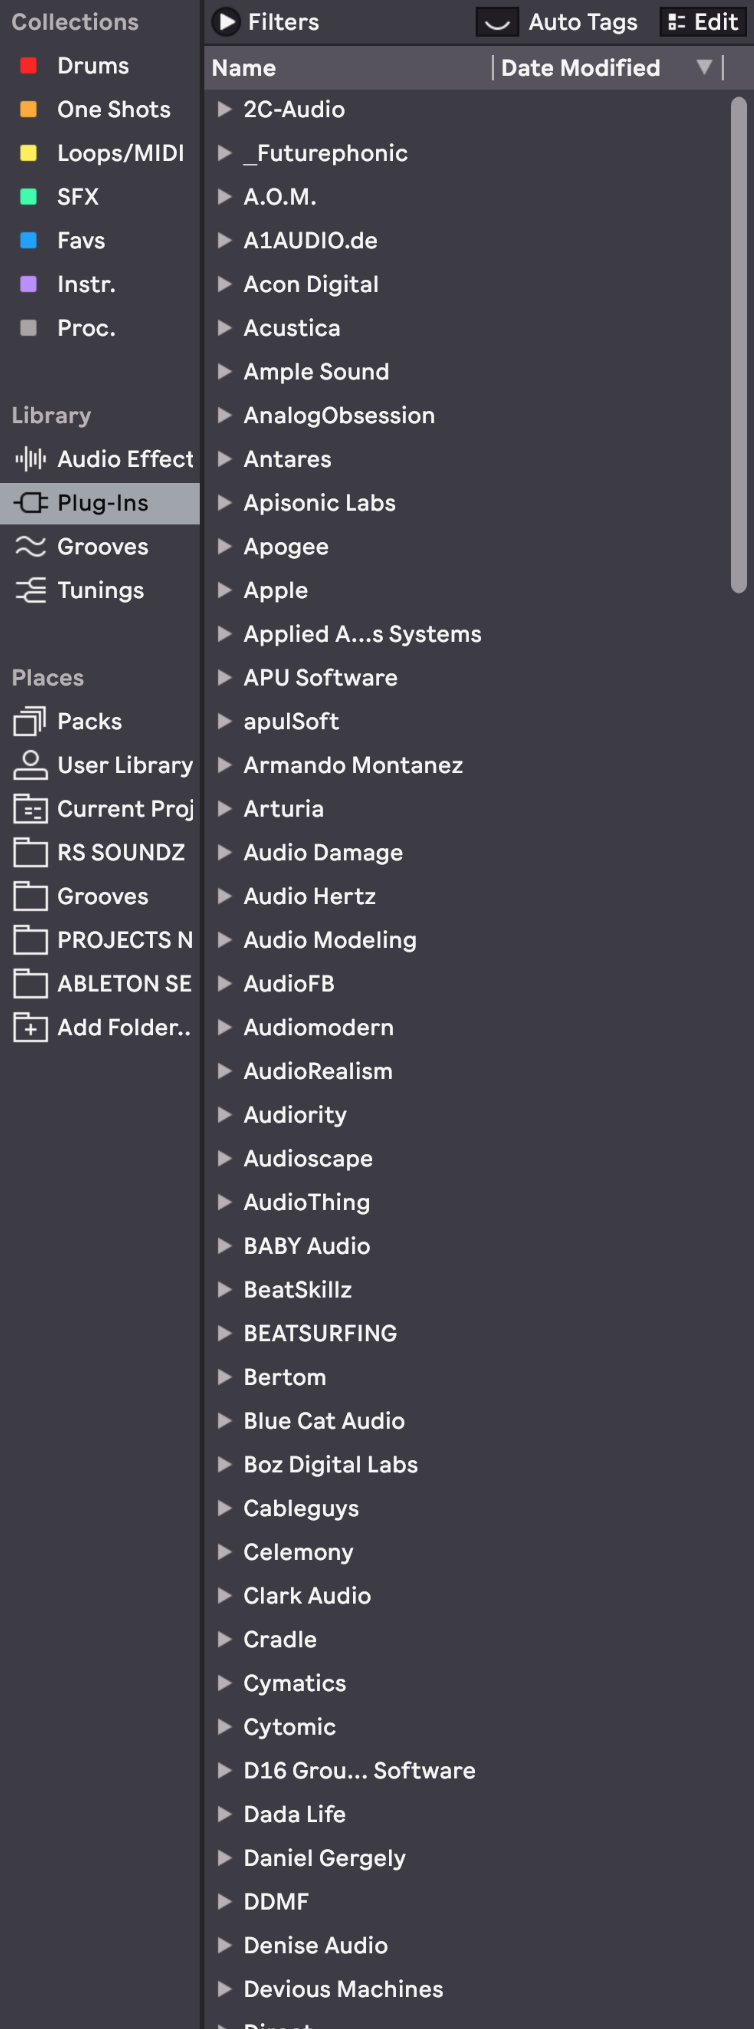
Go from this:
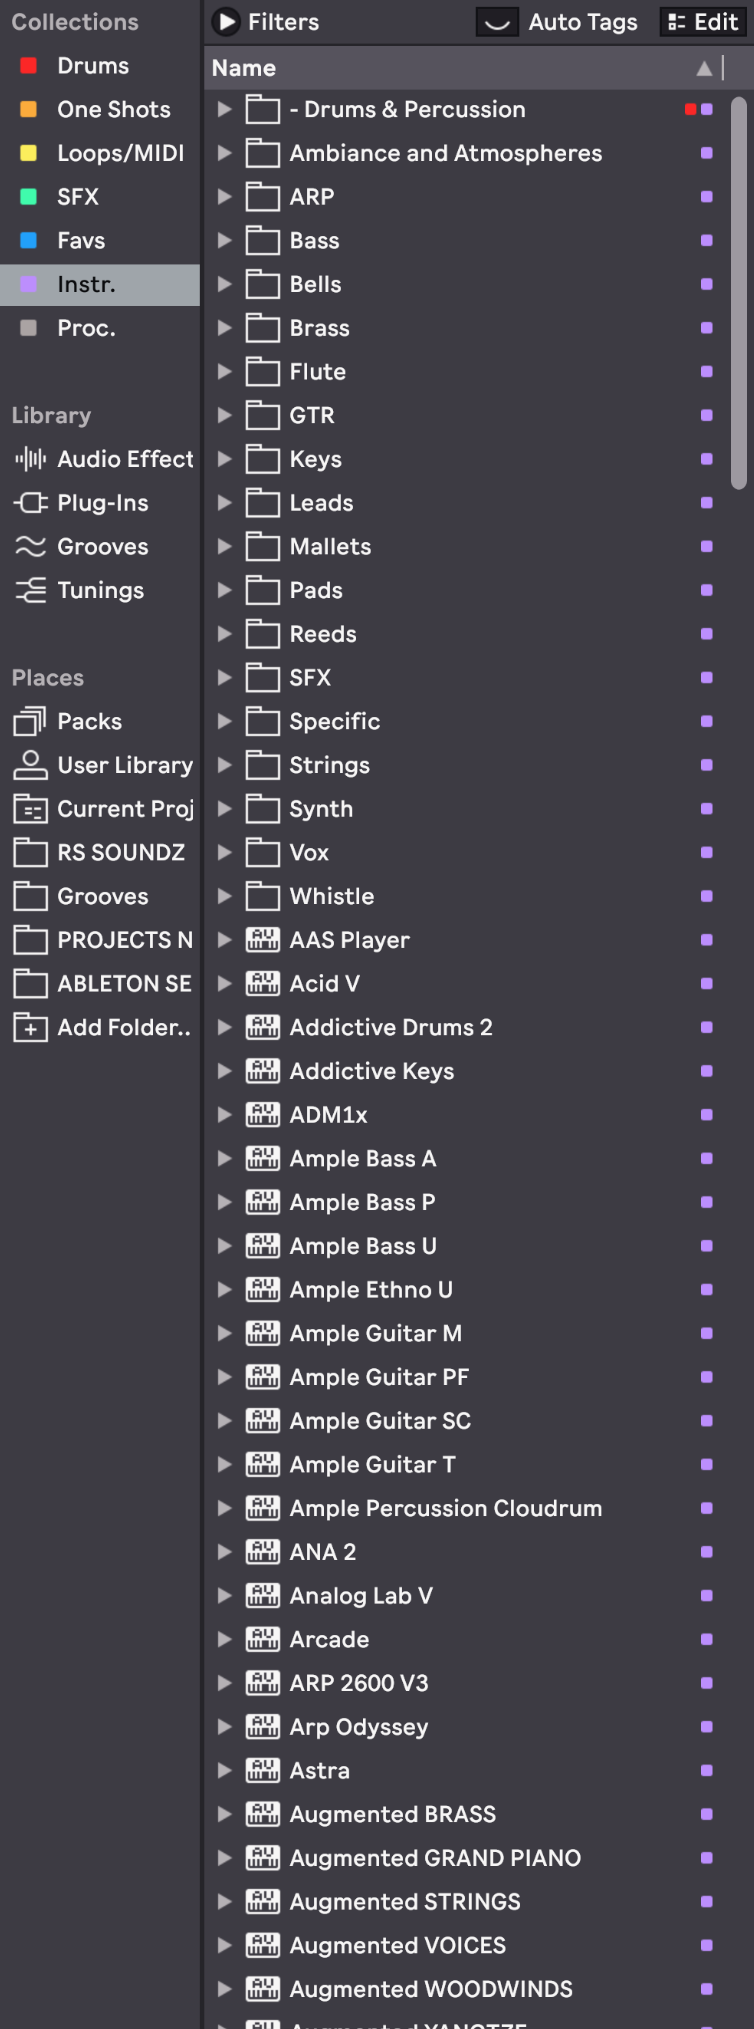
To this:


Do you spend too much time looking through VI manufacturer names or thinking about what a VI or preset was called?
Do you have hundreds of VI plugins that go unused?
Maybe you don't like Ableton's new tagging feature.
Or you simply just want to find the perfect instrument faster.
Well now you can work smarter with your own custom virtual Instrument preset categories!
(See also, categorize your processing plugins or categorize your sample library).
By bypassing Ableton's default plugin category list and tagging feature, you can sort your virtual instruments and presets exactly how you want them to appear - significantly speeding up your workflow or avoiding losing all your custom tags due to an unforeseen software bug.
In the image pictured above (top right), these custom folders can house Ableton files (.aupreset, .adg, .adv, & .als files) containing VI plugin states, presets, audio effect racks and even entire Ableton sessions or templates. Some of these pre-made categories even contain sub-categories – helping to further narrow down your choices and filter out irrelevant results. You can also add special characters before names in order to bring them up faster in a search or make them appear first in a folder.
While this method requires having to save and sort each VI preset manually (since this freebie does not include any presets), doing so will be well worth the effort in the long run, allowing you to focus less about a name or location, and more about the sound you're after.
You may also get to finally utilize those forgotten VI plugins or presets!
Instructions:
1. Place the "Instrument Type" folder in your "User Library" folder.
(By default, this is located in "~/Music/Ableton/User Library" – unless you've specified a custom location).
2. With Ableton open, simply start saving presets for each virtual instrument you own (Serum, Keyscape, SubLab, etc.), and then drag the preset file to the desired category folder within Ableton's browser.
(you can either save a plugin's default preset, your own custom preset, or different presets within the same plugin that fall under a completely different category – Kontakt, along with many others for example).
3. (optional) Assign a "Favorites" color to all of the main folders within the "Instrument Type" folder if you wish to access your VI's using Ableton's Collections section. Otherwise, you can just drag the folder to the Places section and browse your VI's and presets from there.
Done!
You're now on your way to crafting your next hit song even faster.
Let me know if this workflow has helped you or if you have any other Ableton workflows you currently use!
If you find this useful, please consider supporting by repurchasing or donating below 🙏🏼 I’d truly appreciate it.
Enjoy!
More products
Questions or want to request a demo ?
Sign up to our newsletter
Join our community and get the latest tips, deals and product updates straight to your inbox. 🔒 We will never send spam or share your information


